Monday, July 30, 2012

Behavior Management Take 2!

School hasn't even started and I am already switching up what I planned on for a behavior system. I was not a fan of the color code system, but it was the only thing I could find that I liked. Color code seemed easy for me, parents and students. However... then I began seeing a million different versions, with different colors representing different behaviors. I also found it very difficult to find a kid friendly think sheet. This one I found is so weird... they are bald, cone heads! Too weird  for me. A while back I came across this token system. It seemed like a lot of work and I was worried about 1st graders being able to handle/understand this. So needless to say I was not excited about my behavior management plan, but hey, we were a few weeks away from school starting and I hadn't found anything better... until last week!


I was at a workshop with one of our 2nd grade teachers and during some downtime we began discussing what we did for behavior management. I was so excited when she began describing the token system. She obviously has adapted it a bit, but I loved it all over again! So I went through my math cabinet picked out certain color of "tokens" that I was going to use and labeled them with students numbers. Each student will have 10 tokens, with "their" number on it. I also bought a container similar to the one below at Wal-Mart for $4.97. This is to help organize the tokens by each student. Now my friend does not have hers labeled. She just hands them out to anyone... this would make handing them out much easier, but I am just worried about firsties losing, or stealing :( The numbers avoid both issues. 
Creative Options Shallow Utility Box
When students earn 10 tokens by doing the right thing then they can trade it in for a coupon. Coupons must be redeemed on the following Friday. I record this in their take home folder the day they earn their 10 tokens. 


Now my question to her was, okay this is fabulous, BUT what do you do when a kid is not doing what they are suppose to? I shared with her my dilemma with the think sheets. She shared her behavior sheets, they are done weekly and she has codes for each misbehavior. Anytime their behavior interrupts learning they mark the code next to the day. This is just a quick recording of their behavior. At the end of the week it goes home to parents. She said if she notices 3 or more of the same code they fill out a think sheet, which goes home that night. Here is an example of what will go in their folder. (It's a half sheet... save paper!)


Here is the pdf if you like the behavior log!

When the student earns all 5 tokens I note on their folder sheet the day they received their coupon and their choice. Here are the coupons I made for my class.


I am NOW excited about my behavior management... because for the most part it is entirely positive, however I do have a way of tracking the unwanted behaviors. 

I would love to hear what you do in your classrooms for behavior management!

Friday, July 27, 2012

Daily 5: Chapter 7

Finally finished up the Daily 5 book. This last chapter did clarify a few things with implementing the daily 5. I think the 7th chapter will be a great resource to go back to once the year is up an running. My plan is to start the 2nd day of school with talking about the 3 ways to read a book. Is that too early? I just know that I have to start our basal program the second week of school so I would like a little time to really focus on Daily 5, before adding all of that in.
The one thing I did realize from this chapter was that we all are doing the same part of Daily 5 together until about mid October. This makes a lot of sense because chaos can come easily when several activities are going on at once.  I just finished putting together my cards so students can choose their Daily 5 activities in the morning, allowing me time to get choices recorded. I got my inspiration from Mrs. Bainbridge's site, if you click on the image it will take you to her site. Hopefully I will have a picture of my own up soon.


I wish I had taken pictures of my room today, it is really starting to look complete! I think I have made my final trip to Target, Dollar Tree, Hobby Lobby and Mardel! Of course, I will have to go to Wal-Mart for necessities and end up with school supplies but only 2 more weeks!! Today I got some 1st grade resources from my cooperating teacher, she is also teaching in the KC area and when she heard I was switching to first she offered some of her resources as she moved up to 5th. It was great to see her! The only thing I am still looking for is some chimes for a signal... I have a bell but that can be so abrupt.

Saturday, July 21, 2012

Cute new chairs/storage!


I am tagging onto a blog hop for newbies... yup that would be me!


Click the picture above if you would like to join! Janis had this great idea to share a bit of information about ourselves...

1. I teacher in Kansas
2. 1st Grade
3. I have taught 4th grade for 3 years, and now going into my fourth year of teaching.
4. I started blogging in May when I found out I was for sure moving to 1st (and yes this was my choice... I'm so excited!)
5. I have a gmail account and I read all my blogs through Google reader! This saves a lot of time, because it tells me who has news posts and everyone is in one spot.


Anyway, today I got some help from my hubby to create these crate seats! I think I am going to use them at my guided reading table. The only thing I need to add is the ribbon on the sides to help for easier lifting. 
Here's how to make one for your room!


Materials:
Plywood
Crate
Staple Gun
Material (or I used vinyl tablecloth so that it's easier to keep clean)
Stuffing
Ribbon if you want to make handles


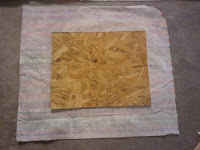
First, you need to cut your plywood to fit just inside of the crate, so it sits on the inner rim that is made for holding file folders. Make sure it fits nicely, remember fabric will be going on the sides. Then lay your piece of plywood on the back side of the material. I measured four inches away from the perimeter, and probably didn't need quite that much.

Then staple one end and the two corners on that side. 

Now you can start stuffing, make sure you stuff all the way to the corners and work it around to avoid lumpiness.

Finally, flip it back over and staple all the edges to the plywood. If I have leftover material I am thinking about cutting a rectangle to completely cover the wood.

Place it in the Crate and take a load of your feet!

Only 5 more to go!! :)


Thursday, July 19, 2012

Daily 5: Chapter 6

Whew! Only 2 more chapters and right now I am feeling more confused about Daily 5 than excited. Thanks to Misty Dawn I did find page 119 to be very helpful in laying out all these "days." I wish there was someone in my building who had implemented Daily 5 in the past, but other than my blogger friends I am on my own!


So here it goes Chapter 6: Writing and Word Work


In this chapter they continually mention that by now the students are aware of Daily 5 and these routines become easier to teach, however looking at page 119 "The first five weeks of Daily 5." The writing portion is introduced right after Read to Self. I feel like the writing part might be a little more tricky. So is page 119 an Idea, but not necessarily a guide for how to start Daily 5. Ahhh, I am confused :(


Anyway, the writing portion is a great time for students to work on their creativity with writing. I love the time taken to discuss spelling words... I always make a point encourage students to use the words they want to and worry about spelling later. I like that they underline the word so they know we are not just going to ignore the word. 


Word work sounds like a fun, hands on time for the kids. I need wikki stix! My question is do you have resources like spelling list, sight word list available for kids to look at or maybe this could be something that is in their book box for the week? 


I am also thinking of making a kind of checklist for students as they have completed a part of the Daily 5... here are a couple of ideas I am contemplating for that.


Daily 5

I like this so I know what they are currently working on and it holds them accountable. However, this does not "record" what they have already done that day.

idea for students who struggle to remember classroom routines

Or I was thinking something like this on the side of their book boxes.
These are the book boxes I ordered, which are obviously going to need some sprucing up... I was being a penny pincher, but now I wish I would've just ordered the colorful ones :(

And then I think, hey why not both? HA... maybe if my order comes in soon and I can get busy right away I will be able to accomplish both of these ideas!


So my sister came up and helped with my classroom yesterday! She is only 14, but I put her to work! We got a lot accomplished. Here is a picture update.


My library is getting there, and I finally hung my calendar. :)


This is what I really needed her help with... hanging all the blue and black material... we also created the city outline down below the whiteboard. I was going to us it for my behavior system, but I still can't make up my mind!! It's cute either way. I am going to get a silver paint pen and outline/draw windows on the buildings! 


Wednesday, July 18, 2012

Dr. Jean Song Book Giveaway!

So yesterday evening I was just reading this wonderful post by Fabulous in First about Literacy! I am switching to first this year and was loving her morning routine, in fact I am thinking about just follow her schedule and then tweaking it to work for me as I go! My team does not work together so I am starting from scratch. During the post she mentioned Dr. Jean's song books. I have almost all of Dr. Jean's CDs but didn't realize she had song books too! What a great way for students to work on fluency!
Sing Along & Read Along with Dr. Jean Readers Variety Pack w/CD gr. PreK - 1
If you click on the picture above it will take you to Amazon where you can buy this set for $56. I added it to my wish list immediately because I was so excited. Then I wake up this morning to find that she is GIVING away this set! Oh my goodness was I excited... so here I am sharing about this wonderful giveaway even though I hope I am the one to win ;) Go to Fabulous in First and sign up for this awesome giveaway today!

Monday, July 16, 2012

Must Have Books

I just finished up my Chapter 5 post and came across this fun linky about Must Have Books. I will share a few and am excited to see what other books I may be missing out on. The host of this linky idea has some GREAT books, most of them I haven't read! 
Hosted by the teacher wife.


Here are my favorites:


Who's Afraid of the Big Bad Book

OH and there is also a blog giveaway here:


Daily 5: Chapter 5

Read to Someone


So this part of the Daily 5 says you should spend 6 days introducing the concept of Read to Someone, my question is... do you complete the 6 days simultaneously with read to self or are these done at separate times?


So far I love the little story of EEKK and how to talk about voice level. I know there are tons of posters on Pinterest that have the cute EEKK poem. An example can be found here.


I am very much into my new superhero theme, but I like the clipart on this poster because of the kiddos being elbow-elbow and knee-knee AND the book is even in the middle! We'll see!

The Check for Understanding is key here. I think this is what I will plan on really, really practice and model for the kids. I like the idea of having a tangible check mark the student holds as a reminder to check for understanding. Hmm... add that to my project list! The ones below were handcrafted, but I also saw ones that were laminated paper.


Complete I Chart with student ideas of what Read to someone should look and sound like. 

Modeling then takes place, just as we did with Read with self. Start with undesirable model and then have the students correct their behavior. Allows for 3 minutes or first distraction for everyone to get a chance to practice. And again the most important part is to come back together and review the I Chart- REFLECT!

When I first saw the 3 ways to read to someone I was confused, but now that she breaks them down through modeling I've got it. I think this a great variety to choose from and allows different levels of students to read together. Check for Understanding- One Book, I read/You read, and Read two books.
Again do some modeling and practice, trying for 4 minutes this time. 

The biggest issue of partner reading would be CHOOSING the book... so that's why we prepare kids with strategies. Let's Make a Deal, choose "read 2 books," or the good ol' Rock, Paper, Scissors! Us 4th grade teachers always told the kids, "Rock it out!" The next day we talk about choosing spots (the previous days I practice teacher has designated spots) and now it's the kiddos turn to choose a spot. The 5th day we talk about choosing partners. The last day is all about coaching. I like the idea of coaching sheets, but what good it is going to be if the students aren't able to read it? I suppose if we practice them enough most of the kids will just know them?

Listen to Read

This section was very short, because most children enjoy this. It is also something that we do not have to work on stamina as much because it tends to be more engaging. I will say the book mentioned not needing headphones and teaching them appropriate volume of the CD player, but I have to say I have tried this in the past and kids get squirrly. It's much easier to manage with headphones! I found headphones for $5 through School Specialty and they are great quality! Never had an incident of Lice, I like the idea of each student having a pair in their book box!

Saturday, July 14, 2012

Best Giveaway!

Check out this awesome giveaway! I cannot believe someone is going to win ALL of this great stuff!
Go to Faithful in First and enter yourself!


I would love to have a substantial start of materials going into my first year in the first grade world!
Good luck to all those who enter!

Friday, July 13, 2012

Behavior Model

Okay so I am in a school that follows the PBS... or more lately know as PBiS. I am not a big fan at all, in fact, I found an example from someone a while back that sums it up. It goes something like this...


A boy comes to school with a gun and the principal hands a bear slip (positive reward slip) to every student standing around him without a gun and says Thank you for keeping our school safe.


So anyway I really got motivated today with creating... I love when I get these creative winds!! I spent most of my day creating labels, notebook covers, etc. to match my superhero theme. I purchased the clipart from Jaime from her Digital Bake Shop on etsy! Love her clip art... simple but cute! I purchased "Super Boys" and "Super Girls," I also grabbed "Out of this world" and "Cute Bugs." Now this behavior idea does not have any clip art included but I think what I will do is have the kiddos pick their favorite superhero out of the clipart and I will put their number on the superhero. After attaching a magnet to the back of their superhero we can use that as they place holder for where they are at that day.


So here's the plan...
They would start at Ready! every morning. They can move up throughout the day for positive reinforcement. The only spot down they can move is to uh-oh! At this point they would fill out a think sheet, and sit away from the group. When they are ready they can go back to Ready! and join the group. The reason I chose to do a color system is so that I can easily communicate to parents daily behavior. I know in 1st grade parents always want to know. So each night I would mark in their take home folder what color they landed on! If they had any think sheets they would need to be signed and returned.


You can check out my color coded idea here, it's still superhero themed :) First time I am using dropbox to share something, so let me know if it doesn't work!

Thursday, July 12, 2012

Ho hum, a new blog design?

Well what do you think? I am going with a superhero theme this year and I have never designed my own blog, just used the templates. I am so jealous of all the cute blogs I see out there and decided to take a stab at it. My husband is a web designer and would probably laugh at me if I showed him what I had done. But I am proud of my creation even if I did waste over an hour working on it just to avoid working on portfolio entries for class. We'll call it a work in progress as I am not completely satisfied with the header... it's still kind of blah and I don't like the font, but I didn't want to spend too much time until I made sure how this whole designing a blog thing worked out. 


Well anyway I went into my classroom yesterday and felt good about what I accomplished in a little less than 4 hours! Organization is underway... I spent most of my time labeling, and sorting books!


This will soon be our meeting/reading area. Still working at the logistics and look at those sad, bare, black walls :(


This is the area I am most proud of clearing out. Almost everything that is laying out does not belong. Curriculum we no longer use, 4th grade books that need to come home, and questionable stuff that I need to discuss with our reading specialist! However all MY stuff officially has a home in a cabinet!


Monday, July 9, 2012

Daily 5: Chapter 4

Can I just first say... I am so pleased to be a part of this book study! We didn't have a lot of interest among teachers in my building but I am just loving this book and this way of teaching reading! This chapter has made me excited for the school year to start, it's all about the getting started!


Day 1: Teaching two ways to Read to Self.
These two ways will be what students are most familiar with, but reading the pictures is probably the focus. Kiddos "read the pictures" from the day they pick up their first book. My one year old daughter already "reads" as she flips through the pages. Teaching kids that this is an okay and important way to read will get them excited about the read to self time. But before letting them free we must model what it is like to read the pictures, then read the words, and then encouraging metacognition discuss our learning.


Introduce the 3rd way of reading: Retelling a Story.
Review the first two ways we learned first. Use the same book from the previous day to demonstrate retelling a story. All three of these will help extend their stamina in reading to self.


*What  I love so much about this book is the dialogue that it is included. Sometimes I am so amazed with student responses I think it must be made up :)


The day we launch the Daily 5,  we would make on I chart (or as I call it a T chart, but the I stands for Independence). Then we brainstorm ideas for what student's roles are during read to self and the teacher's roles.


Modeling Read to Self. So we allow one or two students to model read to self and we discuss while in action using our I chart to guide us. Then let that kiddo dying for attention to demonstrate the inappropriate way, but before he is finished he then has to show the right way.


Okay so we are ready to practice read to self. THREE MINUTES, or as the book states however long until the first student can't sit still any longer. The book mentions choosing student spots the first few time to model distance and possibilities of where to sit.


*A question comes to mind... Do I eventually allow them choose where they sit? or will this turn into a disaster as it often did with my 4th graders? I always let them choose a spot, but then they had to stick to that spot for at least the whole quarter because otherwise they fought over spots.


My favorite, but most challenging part with be sitting down and not managing or even making eye contact. When the three minutes are up we come back and discuss, then engage in another practice. After that practice we are able to review the entire lesson of reading to self. 


Some key points to remember:
*If kiddos are having hard time achieving more stamina we should up the amount of sessions of read to self we practice per day.
*If students ever get off track, MODEL. If you are sick on modeling then you are doing it just enough!
*We want them to be able to read 30-40 minutes by themselves... WOW, all I can say is WOW!

Thursday, July 5, 2012

Seeing the light!

Well maybe not quite a light, but I am working my way through the tunnel. I finished ironing, hanging, stapling up black material on my back wall. Whew, that was a lot of work but totally worth covering that AWFUL, burnt orange color. I also starting rearranging furniture, but am having a hard time deciding exactly how I want to setup my classroom. My biggest issue right now is where to put my guided reading table(s). Right now, it is the 3 tables put together on the right of the picture. It's at the front of my classroom right now, but I am trying to decide if I should move it to the back of the room. Our meeting area is in that back corner and I feel like if I put the guided reading table on the back wall that will be too much teacher stuff at the back.


I also cannot decide about all those polka dots on the wall? They were left by the previous teacher and I don't know what to do with them. I may take some of them down just because I think it is a little too busy. Any thoughts?

Well after my 4 hours in my classroom I felt like I had accomplished a lot, however I still have a long ways to go.